First steps
A first session that needs no car: open a ROM file, find its definition and change a table. Then the steps for connecting to a real ECU.
Part 1: Work on a ROM file (no car needed)
1. Open the ROM
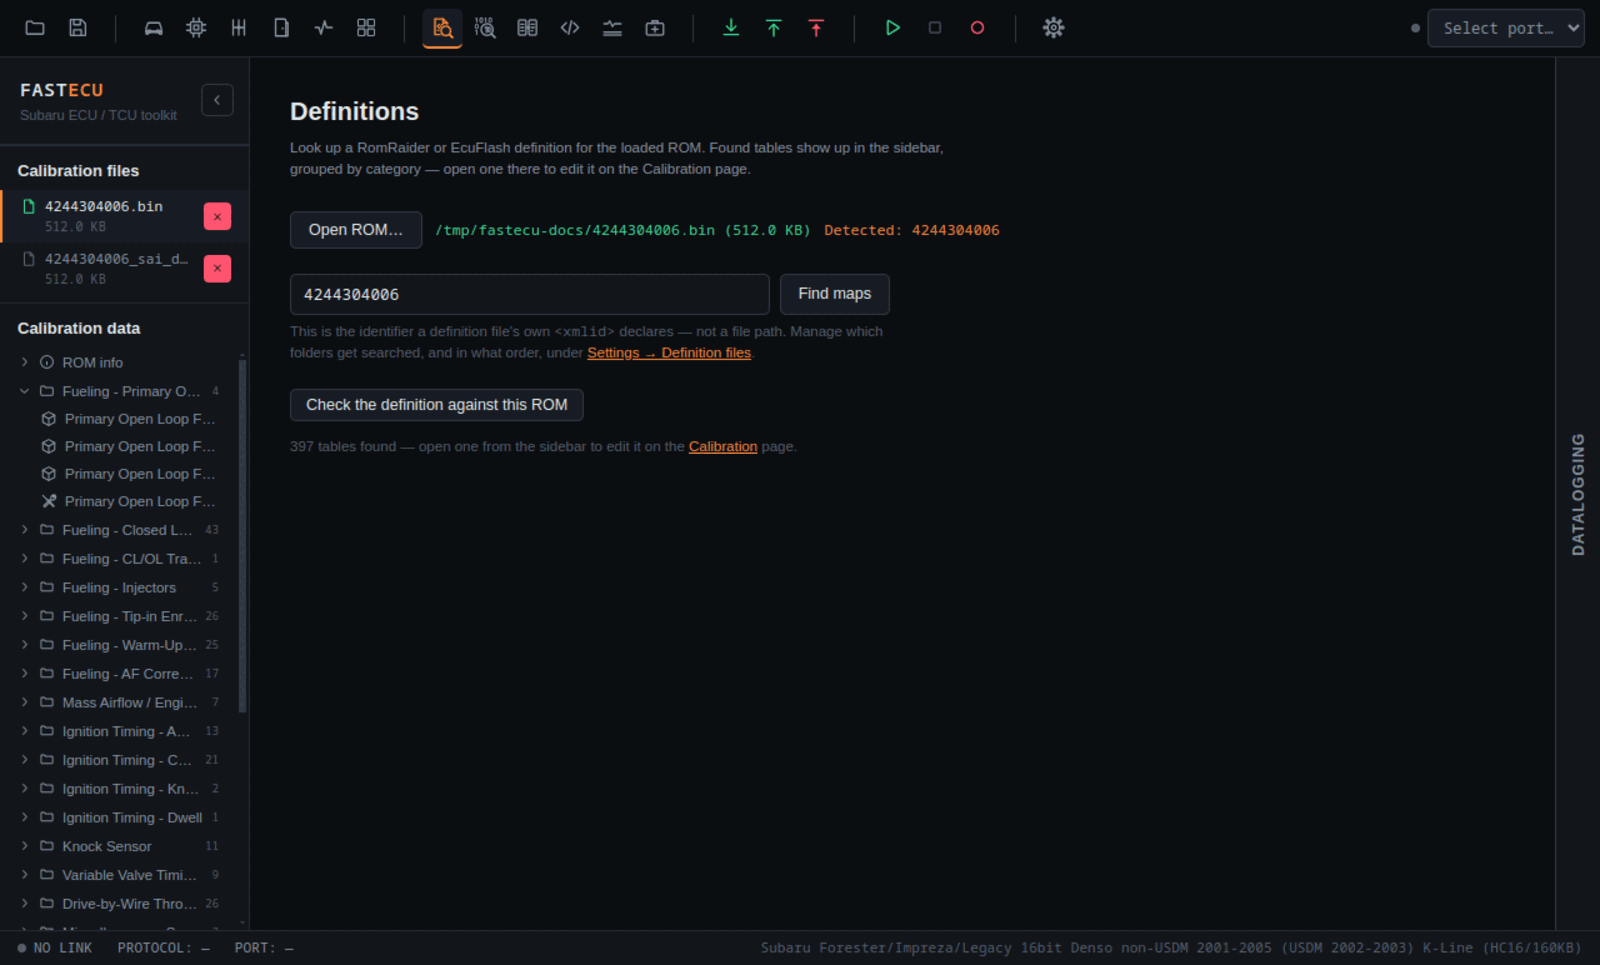
Use Open ROM in the toolbar (the folder icon on the far left, or the button on the Definitions page) and choose a ROM file. FastECU reads the ROM's internal ID and compares it with every enabled definition.
2. Check the definition
If a definition matches, the Definitions page fills in the identifier and finds the tables at once, and a line tells you how many it found. If not, type the ROM identifier by hand or add your own definition under Settings › Files › ECU definition sources.
- FastECU reads RomRaider and EcuFlash definition files.
- The Custom source is for definitions you add yourself. The one marked Main is checked first when several match.
- The collapsible parse warnings panel lists non-fatal problems in the definition.
3. Open a table
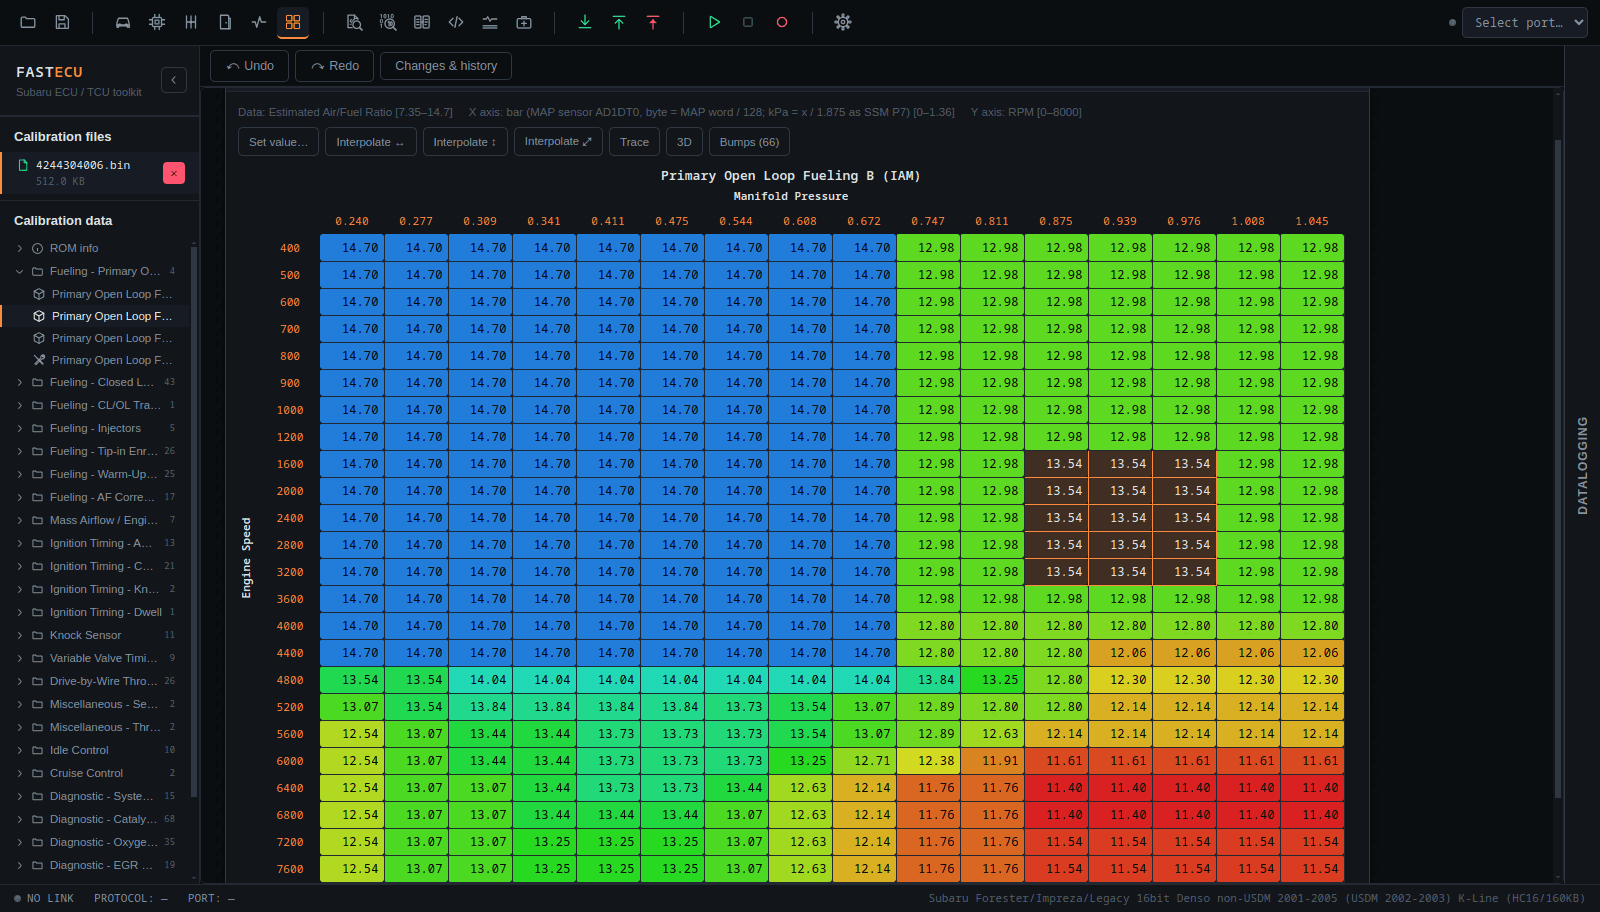
The sidebar shows the tables grouped by category. An icon tells the shape: a wrench or screwdriver is a single value or switch, bars are a table with one axis and a cube is a table with two axes. Click one and it opens in its own window on the Calibration page. You can open as many as you like and arrange them side by side.
4. Edit
Select cells in the grid and change them with + and -, set a value, interpolate or copy and paste. Every change is a step you can undo and redo with Ctrl+Z and Ctrl+Y. The change list shows all changes since you opened the ROM.
5. Save
Save ROM As writes your edited ROM to a new file. Keep the original file untouched.
Part 2: Connect to the car
Writing a ROM is the riskiest thing FastECU does. A failed or interrupted write can leave an ECU that will not start. Always read and save the original ROM first, keep power stable and use Test write before a real write. Hardware paths that have not been tried on a real car are marked as such in this documentation.
- Get a license key and activate it in Settings › Account (how).
- Choose your car on the Vehicle page: manufacturer, model and variant. The summary shows which ECU, TCU and BIU protocol will be used. On the ECU, TCU or BIU page you can pick another protocol in the connection card, for example for a car that is not in the catalog.
- Connect your adapter and pick its port in the toolbar.
- Try something harmless first: read trouble codes or log live data. These need no flash session.
- Read the ROM from the ECU page's ROM tab. It opens as a loaded ROM; use Save ROM As to save it somewhere safe. This is your backup.
- Edit as in part 1 and save under a new name, then Test write (a full write session with the writing itself disabled, so it changes nothing in the ECU), and only then Write ROM.
Where next
More documentation on each connection method, the tuning tools and troubleshooting is coming. For now the documentation home lists everything that exists, and the forum is the place for questions.