Disassembler
The Disassembler turns the bytes of a ROM into instructions, and into C-like code you can read. It is for finding out what the ECU does with a table or an input.
The Disassembler is the toolbar button with the </> icon, or Tools › Disassembler in the menu. It supports M32R (Hitachi and Unisia Jecs ECUs), SH-2 / SH-2A (Denso and Hitachi DIT) and HC16 (Denso 16-bit). It is not in the Windows 7 build.
Projects
The Disassembler works on projects of its own. A project is a .fpr file, and every ROM you import into it is copied into a folder beside it together with the settings for how to decode it. A project does not depend on the ROMs open in the rest of FastECU or on the original files.
- New project and Open project are at the top of the page. New projects go to the folder set in Settings › Files › File locations › Disassembler projects.
- The last project you used opens again when you return to the page.
- The format is the one of FastECU-MCU-DA, so projects open in either program.
Import a ROM
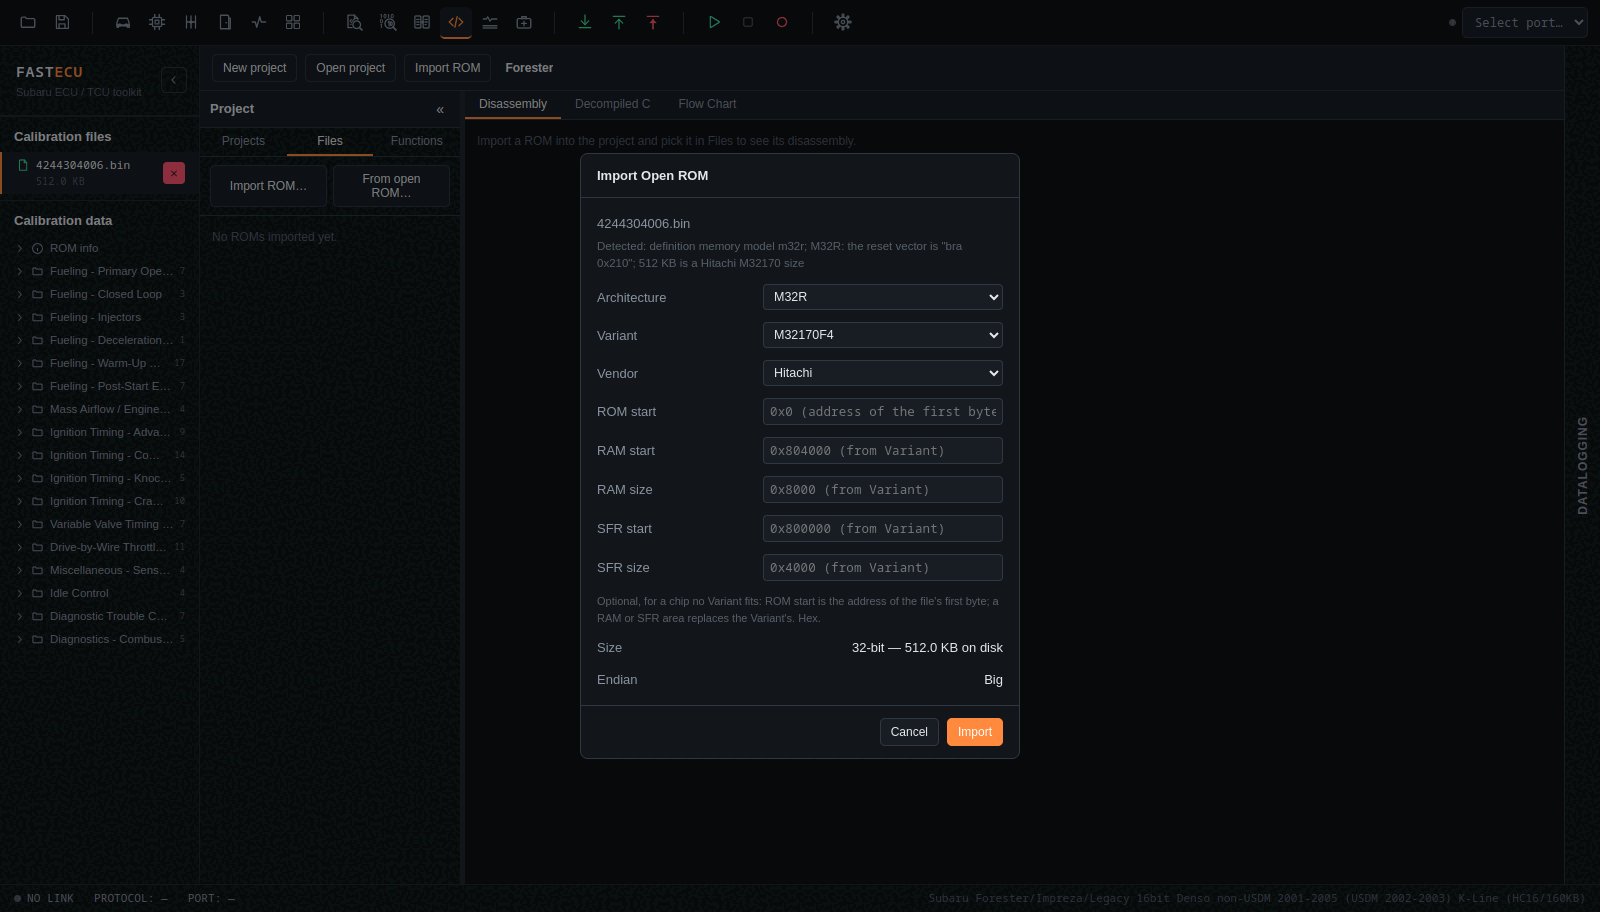
In the Files tab press Import ROM… for a file on disk, or From open ROM… for one that is loaded in FastECU (the project gets a copy as it is now, edits included; later changes to the open ROM do not reach it).
The dialog starts on what the ROM says it is. It looks at the reset vectors and the size to choose the Architecture, the Variant (the chip) and the Vendor, for example a 512 KB M32R file becomes M32170 and Hitachi. You can change them, and for a chip no Variant describes you can set the ROM start and the RAM and SFR areas by hand. Right-click a file later for Set Decoding… or Remove from Project.
The sidebar
- Projects: your projects.
- Files: the ROMs of the project. A file opens on its Entry function.
- Functions: every call target in the ROM with its number of callers, the entry point first, and known names where a vendor profile has them. There is a filter box.
Disassembly
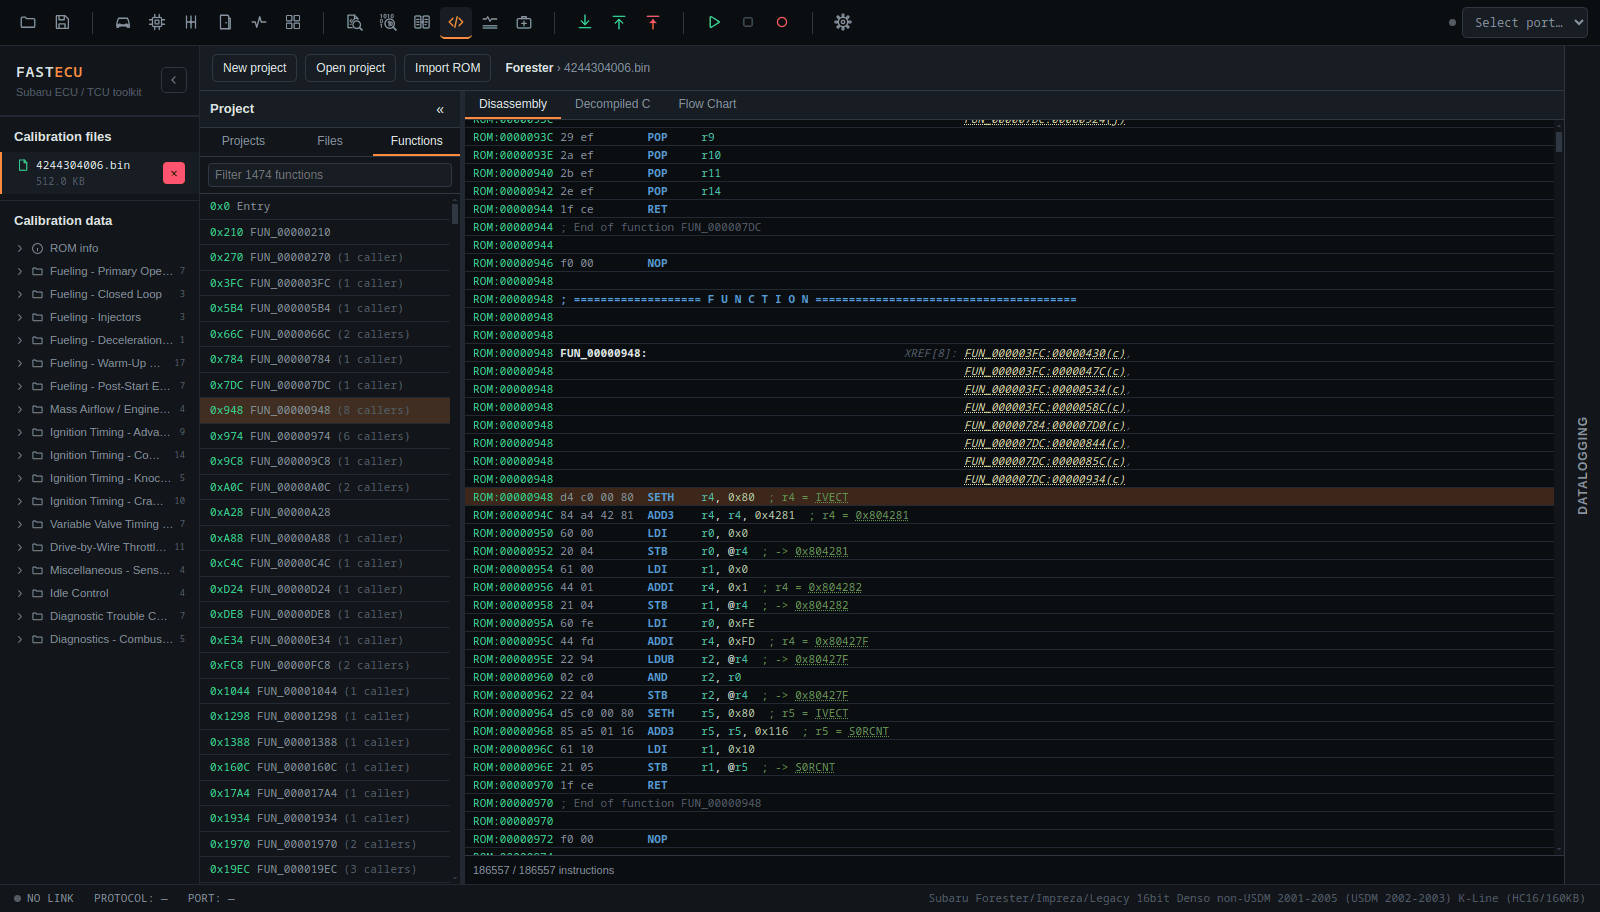
The whole ROM in one long list, with function banners, labels, lists of the callers of a function and the places that read, write or build the address of data. After the image come the chip's RAM and register areas. Addresses are links, and Back goes to where you were. Clicking a row selects its function.
Decompiled C
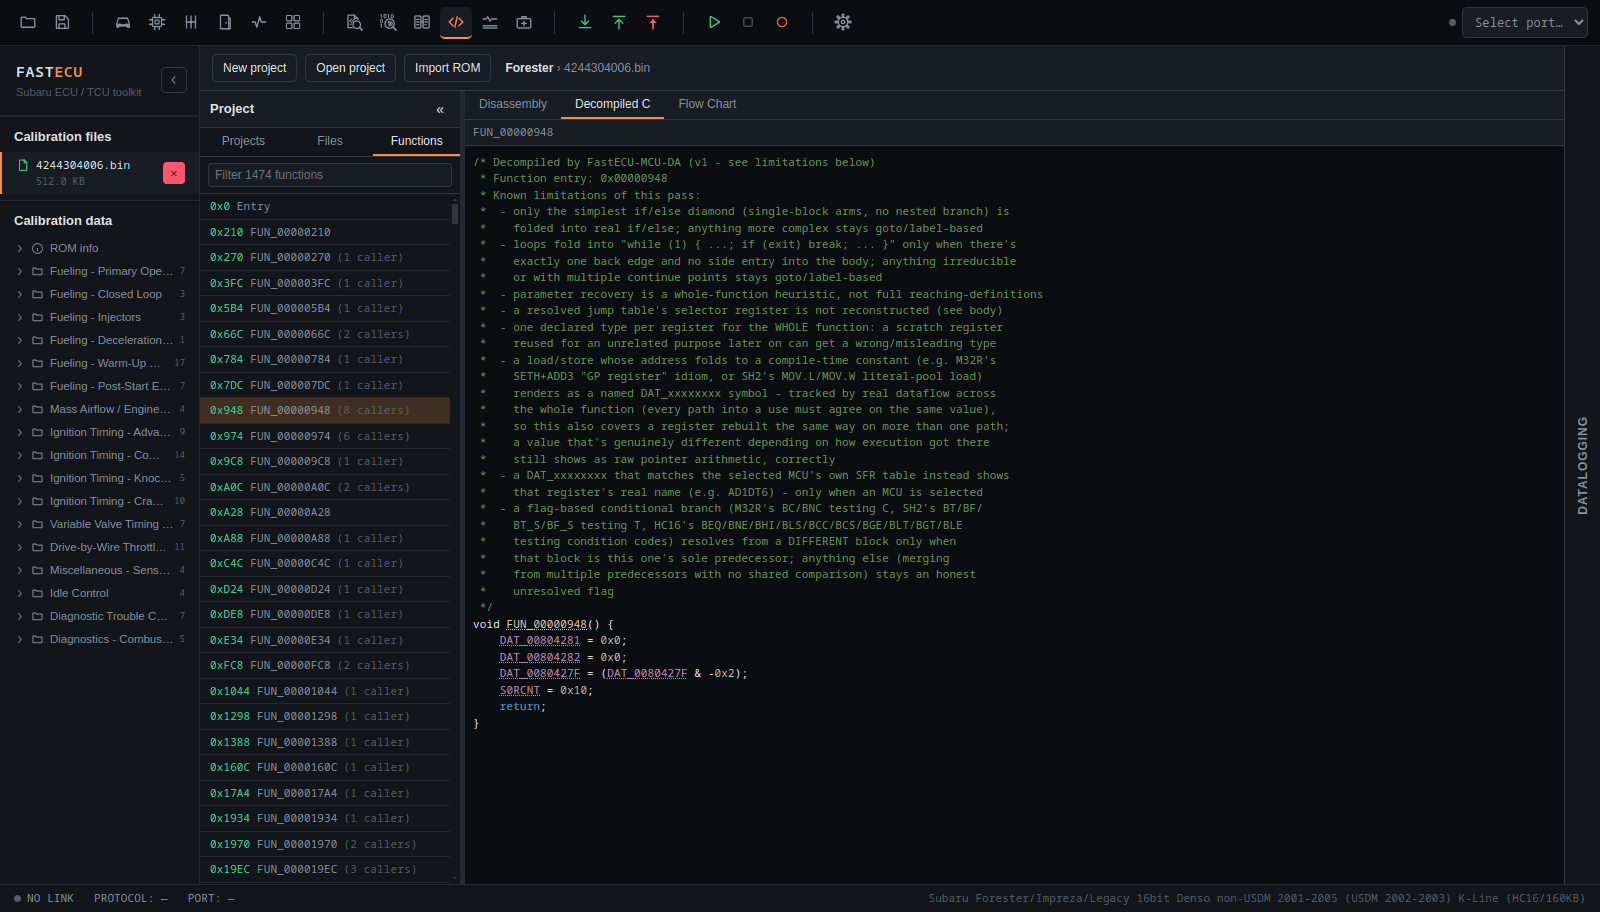
The Decompiled C tab shows the selected function as coloured C. Double-click a FUN_ name to go to that function, or a DAT_ or register name to its place in the listing. A data address has a tooltip that tells where else it is used.
The decompiler writes down its known limits at the top of each function. Treat the C as a guide: check a line that matters against the disassembly before you rely on it.
Flow chart
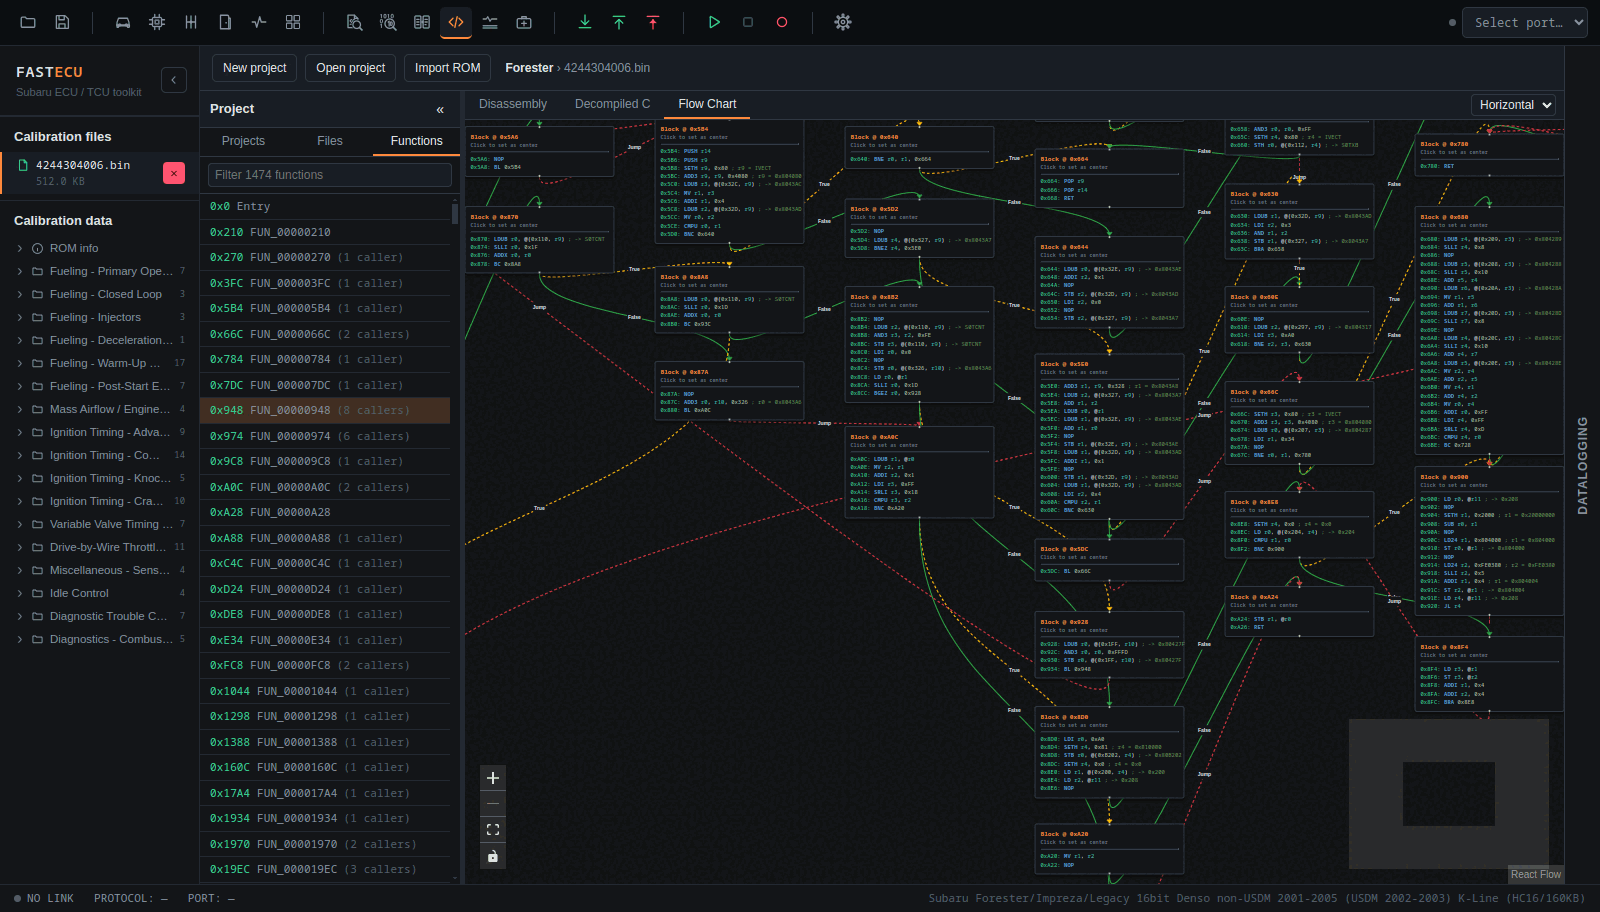
The Flow Chart tab draws the blocks of the function and how control moves between them. Choose horizontal or vertical layout, and click a block to centre on it.
Menu
Tools › Disassembler has: New Project, Open Project, Import ROM File, Import Open ROM, Go to Address (Ctrl+G, or g on the page), Export Disassembly and Export Decompiled Function.
With the AI assistant
The AI assistant can use the current project, read-only: list functions, read and decompile them, find where code uses an address, and find the functions that read a table of your definition. It is a quick way to ask "what uses this map?"